
Now Reading: What is a Good Welding Helmet?
-
01
What is a Good Welding Helmet?
What is a Good Welding Helmet?
If you’ve welded even a day, you already know the welding helmet is the one piece of gear you can’t skip. Sparks fly, UV and IR light blast your eyes, and without protection you’d be done in seconds.
The tricky bit? Buying one. Walk into a store or scroll online and you’ll see helmets everywhere-different brands, models, prices. It’s enough to make your head spin. So what makes good one? Not just a dark lens. You want safety, comfort, and a fit that matches the way you weld. That’s what I’ll be breaking down here.
Why a Welding Helmet Matters?
Before diving into features, it’s critical to understand why the welding helmet is such a vital part of your toolkit.
- Eye Protection – Welding produces intense UV and IR radiation that can cause “arc eye” or photokeratitis. A good helmet filters out harmful rays while allowing clear visibility.
- Facial Safety – Sparks, molten spatter, and metal debris can cause severe burns. A helmet creates a physical barrier.
- Improved Work Quality – Clearer visibility and correct shade levels reduce mistakes, leading to cleaner, more precise welds.
- Comfort and Endurance – Welding often requires long hours. A cheap or badly balanced helmet will leave your neck sore by the end of the day. On the other hand, a good helmet takes the strain off-it makes welding feel less like a workout on your neck and more like steady work you can keep up with.
At the end of the day, it’s not just gear. It’s what keeps you safe and lets you keep welding tomorrow.
Types of Welding Helmets
To answer “What is a good welding helmet?” we first need to understand the different types available.
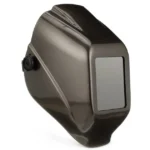
1. Passive Welding Helmets
These have a fixed dark lens (usually shade #10). They don’t change with brightness. They’re tough, cheap and don’t need batteries, but you’ll be flipping the hood up and down between welds. That slows you down, and for beginners it’s not ideal. Old-school welders who like simplicity still swear by them.
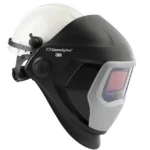
2. Auto-Darkening Welding Helmets (ADF)
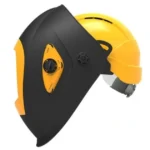
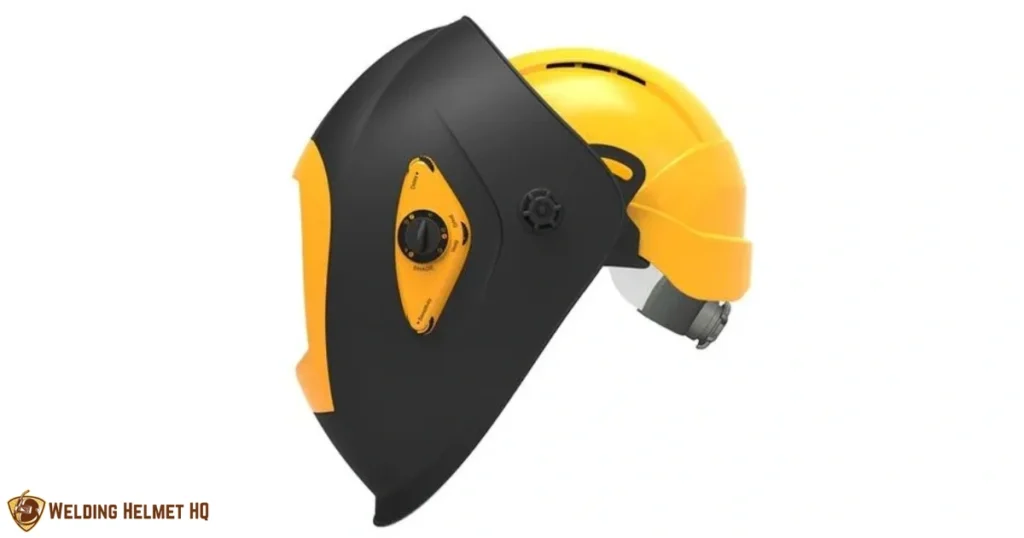
Auto-darkening helmets (ADF) use LCD filters that darken the moment the arc strikes. They’re faster, easier, and save your neck from constant nodding. The downside? They cost more, need batteries or solar assist, and can glitch if the sensors get blocked. Still, they’re a great pick for both newbies and pros.
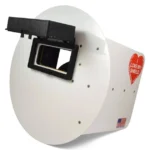
3. Powered Air Purifying Respirator (PAPR) Helmets
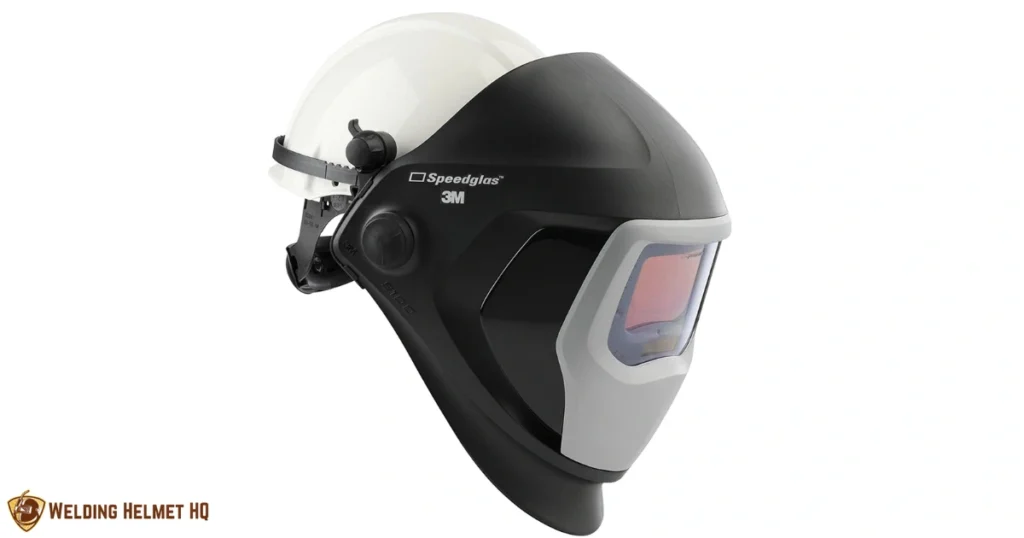
PAPR helmets take things further by adding a respirator to keep fumes out of lungs. Great for long shifts and tight spaces where air quality is an issue. On the flip side, they’re heavier, pricey, and need regular upkeep-usually worth it for industrial work.
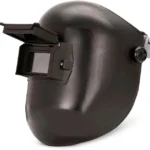
4. Pancake Welding Hoods
Pancake hoods are flat, super light, and popular with pipeline welders outdoors. They cut glare in bright sun, but they don’t offer the same all-around protection as a full hood. Best if you’re on a line crew.
Key Features of a Good Welding Helmet
Now, let’s break down the critical factors that define whether a helmet is truly good:
1. Lens Shade and Clarity
A good helmet should meet ANSI Z87.1 standards for UV/IR protection. Passive hoods are stuck on one shade. Auto-darkening helmets, though, let you adjust anywhere from 8 to 13 depending on what you’re running. If you can get one with a 1/1/1/1 clarity rating, even better-it keeps the view sharp and your eyes less tired.
2. Reaction Time (Switching Speed)
This is how fast the lens reacts when the arc strikes. On a good helmet, it’s almost instant-somewhere between 1/10,000 and 1/25,000 of a second. The quicker the switch, the less your eyes feel fried at the end of the day.
3. Viewing Area
Bigger windows (around 4″ x 3.8″) give you more to look at and make tracking the weld pool easier. Smaller ones work fine for detailed jobs, but beginners usually find them a little restrictive.
4. Power Source
Options include replaceable batteries, rechargeable batteries, solar assist, or a combination. A good helmet balances reliability and convenience – dual power sources are ideal
5. Weight and Comfort
A lighter helmet makes a huge difference when you’re under the hood for hours-it saves your neck from a lot of pain. The better ones also come with padded straps and an ergonomic fit so the thing actually feels comfortable while you’re working.
6. Sensitivity and Delay Controls
- Sensitivity: Adjusts how much light is needed to activate the lens. Useful when welding at low amps.
- Delay: Determines how long the lens stays dark after welding stops. A good welding helmet allows adjustable delays for different tasks.
7. Durability and Build Quality
A helmet’s no good if it falls apart. It needs to take sparks, heat, and even a few drops without breaking.
Safety Standards to Look For
Safety standards matter. In the U.S., you’ll want ANSI Z87.1 on the label. In Canada, it’s CSA Z94.3, and in Europe, EN 379 or a CE mark. If it doesn’t meet at least one of those, skip it.
Common Mistakes Welders Make When Choosing Helmets
Mistakes to avoid? Don’t just grab the cheapest hood. Some cut corners on safety. Don’t ignore clarity either-if the lens is cloudy, your welds will show it. Comfort counts too. If it’s heavy or digs into your head, you’ll end up hating it and not wearing it. And always match the helmet to the work-MIG, TIG, Stick, Plasma-they all have different demands.
Comparing Welding Helmet Features in Detail
So what actually makes a welding helmet “good”? You’ve got to look past the basics and see how the features affect you when you’re under the hood.
1. Auto-Darkening vs Passive Helmets
Passive hoods are tough and simple-no batteries-but you’ll be nodding it up and down all day. Auto-darkening saves your neck and your time, but costs more and relies on sensors. Most folks today go with auto-darkening.
Verdict: For most welders today, a good welding helmet is auto-darkening because of its flexibility and safety improvements.
2. Fixed Shade vs Variable Shade
Fixed shades (usually #10) work if you’re doing the same weld over and over. But if you’re bouncing between MIG, TIG, and Stick, variable shades (8-13) are the way to go.
Verdict: A good welding helmet should ideally have variable shades-especially if you perform multiple welding processes.
3. Optical Clarity Rating (EN 379 Standard)
This is rated using four categories:
- Optical Class (image accuracy)
- Diffusion of Light (clarity through the lens)
- Variations in Luminous Transmittance (consistency of shade)
- Angel Dependence (performance at different viewing angles)
Ratings range from 1 to 3, with “1/1/1/1” being the highest clarity.
Verdict: A good welding helmet should aim for 1/1/1/1 clarity for reduced eye strain and precision welding.
4. Number of Arc Sensors
- 2 Sensors: Found in budget helmets. Can fail if sensors are blocked by obsturctions.
- 3-4 Sensors: Offer more reliable coverage, especially in tight positions.
Verdict: A good helmet should have at least 3 sensors-4 is best for consistent performance.
5. Switching Speed (Reaction Time)
- Entry-level helmets: ~1/3,600 second
- Good mid-range helmets: ~1/10,000 second
- Premium helmets: up to 1/25,000 second
Verdict: The faster the speed, the better for eye protection. A good welding helmet should be 1/10,000 or faster.
6. Power Options
- Battery Only: Reliable but requires replacements.
Solar assist with battery backup is what you’ll see most often-it’s simple and works well.
Rechargeable lithium-ion batteries are another option. Handy, but they cost a bit more.
Verdict: The best setup is usually a helmet that gives you both solar and battery power, so you’re not stuck if one fails.
7. Comfort and Adjustability
A welding helmet may check every technical box, but if it’s uncomfortable, it’s not “good”. Look for:
- Lightweight build (under 2 lbs if possible)
- Adjustable headgear with multiple points of contact
- Sweatbands or padding
- Balanced weight distribution to prevent neck strain
Pros and Cons of Premium vs Budget Welding Helmets
| Category | Premium Helmets | Budget Helmets |
|---|---|---|
| Price | $200-$500+ | $40-$150 |
| Optical Clarity | 1/1/1/1, large viewing windows | Varies, often lower clarity |
| Comfort | Lightweight, ergonomic | Can be heavier and less padded |
| Durability | High-quality materials, long-lasting | May wear out quickly |
| Technology | Multiple sensors, high switching speed, advanced modes | Basic ADF, fewer features |
| Best For | Professionals, daily welders | Hobbyists, learners, occasional use |
Verdict: A good welding helmet doesn’t have to be the most expensive, but it should strike a balance. For beginners, a mid-range helmet with auto-darkening, at least 2 sensors, and decent comfort is a solid choice. For pros, investing in premium clarity and comfort pays off long-term.
The Buyer’s Guide – How to Choose a Good Welding Helmet?
When shopping, ask yourself these questions:
1. What type of welding do I do most often?
- MIG, TIG, Stick, or cutting – each process may need different shade levels.
2. How often do I weld?
- If welding’s your day job, don’t cheap out-get a helmet that’ll last and stay comfortable. But if you’re just tinkering in the garage once in a while, a budget hood will cover you.
3. Do I need extra features?
- Respirators, grinding modes, or larger viewing areas may be worth it depending on your work.
4. What’s my budget?
- Skip the rock-bottom helmets. Spend what you can, but make sure you’re getting something safe and practical for the way you weld.
5. Does it meet safety standards?
- Don’t overlook this one. A helmet without ANSI Z87.1 or EN 379 on the tag isn’t worth the risk-those standards are what guarantee your eyes and face are actually protected.
6. Is it comfortable for long sessions?
- If you’re welding for hours, comfort makes or breaks the helmet. Go for one that’s light, with headgear you can adjust and a fit that doesn’t wear you down.
Tips for Getting the Most Out of Your Welding Helmet
Over the years I’ve learned a few small habits that keep my helmets working better, longer. Keep the lens clean-smudges and spatter kill your visibility. Don’t just toss it anywhere-I once ruined a lens by dropping mine in a toolbox. Change the batteries before they give out, glance at the sensors every so often, and when the helmet starts feeling old, swap it out. A new one really does make the job less of a fight.
Expert Tips for Choosing and Using a Welding Helmet
Even with all the specs and features, choosing a good welding helmet sometimes comes down to practical experience. Here are some expert tips:
1. Match the Helmet to the Job
Not every helmet suits every situation. For example:
- Pipeline welding outdoors – Pancake-style helmets with sunlight-resistant shades.
- Shop welding – Auto-darkening with large viewing windows for versatility.
- Industrial Environments – PAPR helmets with built-in respirators for maximum protection.
2. Don’t Compromise on Clarity
If you plan to weld for years, invest in optical clarity. Eye strain builds over time and can reduce productivity and cause long-term vision issues.
3. Try Before You Buy (If Possible)
Comfort is subjective. The same helmet may feel perfectly balanced for one welder but heavy for another. If possible, test different models to see which feels best.
4. Keep an Extra Helmet
If welding is your profession, always keep a backup helmet. Electronics can fail, and you don’t want downtime to cost you a job.
5. Upgrade When Needed
Technology in welding helmets has improved dramatically in the past decade. If you’re still using a 10-year-old helmet, chances are you’re missing out on safety and comfort improvements.
Maintaining a Welding Helmet
A good welding helmet is only as good as its maintenance. Here’s how to extend the life of your gear:
1. Regular Lens Cleaning
- Use a soft microfiber cloth and lens-safe cleaner. Avoid harsh chemicals that can scratch.
2. Replace Covers and Lenses
- Outer and inner protective covers take damage from sparks and spatter. Replace them regularly for clear visibility.
3. Check Batteries and Solar Panels
- Auto-darkening helmets need reliable power. Keep spare batteries handy.
4. Inspect Sensors
- Dirt or welding debris can block sensors, preventing proper darkening. Clean them frequently.
5. Store Safely
- Avoid tossing your helmet in a toolbox. Store it in a padded bag or safe spot to prevent cracks.
The Future of Welding Helmets
Technology in welding helmets continues to evolve. Some emerging features include:
- Augmented Reality (AR) Integration – allowing welders to see digital overlays while working.
- Bluetooth Connectivity – linking helmets with mobile apps for monitoring usage and settings.
- Lighter and Stronger Materials – reducing neck strain while offering better protection.
- Self-Tinting Smart Glass – Future lenses may automatically adapt to light conditions without sensors.
As innovations continue, the standard for what defines a good welding helmet will keep rising.
Conclusion
So, what is a good welding helmet? The truth is, it depends on how you weld. A solid helmet should protect you from sparks and UV, give you a clear view of the weld, switch shades fast, and not feel like a brick on your head.
Weekend welders can get by with a good mid-range auto-darkening hood. But if you’re welding for a living, don’t skimp-go for a premium helmet. The comfort and reliability will pay you back every shift.
Frequently Asked Questions (FAQs)
What shade level is best for welding?
Most welders use shades 9-13, depending on the process. Stick welding usually needs darker shades than TIG or MIG. A good helmet allows variable shade adjustments.
Are cheap welding helmets safe?
Many budget helmets meet ANSI standards, so they are technically safe. However, they may lack durability, comfort, and clarity. For beginners, a budget helmet is fine – but professionals should invest in mid-to-high-end models.
How long does a welding helmet last?
With proper care, a good welding helmet can last 5-10 years. Replace parts like batteries, covers, and headgear straps as needed.
Do I need an auto-darkening helmet?
Not strictly, but auto-darkening helmets are considered more convenient and safer for most people. They reduce neck strain and make positioning easier.
What size viewing area should I look for?
A large viewing window (around 3.9″ x 3.8″) is great for beginners and professionals who move a lot. Smaller windows are fine for precise work.
Can a welding helmet be used for plasma cutting or grinding?
Yes, it has grind mode or lower shade options (shade 3-8). Check the specs before buying.
Is a PAPR helmet worth it?
For industrial settings with poor ventilation, absolutely. They’re expensive but protect your lungs from hazardous fumes.
![How Do Auto Darkening Welding Helmets Work? [2026 Expert Guide]](https://weldinghelmethq.com/wp-content/uploads/2025/07/auto-darkening-welding-helmet-e1753786061187.webp)